Monday, October 31, 2011

Electrifying!

Wiring anything can be daunting if you're not an electrician, which I am not.  As usual, I search and research until I find a suitable article to help me understand.  There is an excellent "how to" on the net including greenleafminiatures.com site and cirkitconcepts.com.
I decided to use "hybrid" wiring for my house.  It combines the "round wire" and the "flat wire" with connections secured by brass brads that are the size of mosquitos (well, little mosquitos).   The goal is to have plenty of light in your house without showing the wires.
I started by round wiring under the house (entering from the plug through the foundation) and coming into the house at the back wall and connecting to flat wire that spreads in both directions.  I also came up through the floor with round wire by the stairway .so I can run a flat wire around the bottom of the interior wall.  I plan to add an electrical outlet on that wall for a lamp later on. All of the first floor ceiling lights will be run under the second story floors but they are tied into the main electric at the back wall. This will necessitate installing the floors upstairs with a subfloor, but it will be worth it if I need to work on or change those lights out later.The chimney breast and fireplace will cover all the connections and if I work it right, I'll be able to open the chimney breast like a door should I need to repair any electrical connections later on. The rest of the flat wire will be covered with wallpaper.
Electrifying

Friday, October 28, 2011

Planning and Doing........

Okay, I've read the assembly instructions multiple times, I've sealed and sanded each piece, and I'm still nervous about commiting to the assembly. I finally decide that I can go ahead and assemble the base. It's basically a rectangle that has crossbraces running between the sides in kind of a W fashion. I glue, I square, I adjust, I clamp, I square again, I glue again, I use the brad gun, I hammer, I square again, OMG! I've built human size outbuildings easier than this! I managed to get it square (as evidenced by it lining up with the floor base that appears to have squared corners). I leave it to dry...
Tick, tick, tick....
Trying to get a feel for how everything fits..
Next day - The base seems to be pretty solid so on to the next step. Before I add my flooring, I need to start wiring the first level because I want it all hidden and under the floor is an excellent place to hide it. Basically I'll have hybrid wiring with wiring from the transformer and flat tape running down each wall and through the interior doors. I will then run tape from the upstairs walls over the 2nd level floor to supply the ceiling lights for the 1st level. Just a small hole drilled through the 2nd level to the ceiling of the 1st level.  The most difficult thing about dollhouse wiring (to me) is handling the tiny tiny brass nails that are used to splice the wires.  After that, it's all gravy.

It's time to add the flooring on the 1st level. My plan is to have (from left to right) dining room, formal parlor, kitchen. I'd love to have the kitchen next to the dining room but since the front door opens to the staircase in the middle and I don't want to walk in to the kitchen and I do want to add a fake wall with french doors in the back the dining room...this the way it has to be. I temporarily add the room dividers and arrange the furniture I have. I need to see how much floor space to give each room.  That done, I mark the floors, ceiling, and back wall with pencil so that I can remember where they go.  I can then glue my hardwood floors down. I used Houseworks Dark Walnut in the dining room and formal parlor. After multiple sandings and gloss sprayings (word?) they look like plastic. Crap! I was going for glass.  Later I read that satin finish works better in a dollhouse. Lesson learned, but I think I'll move on..  I opted for the Hobby Lobby Mayberry Oak in the kitchen. I sanded down the kitchen floor to make it smoother and thinner.  It sands nicely, so nicely that when I paint it, the individual boards disappear.   I paint it white, then gray, then streak it, antique it, I tweak, okay I'll stop. I then decide to stencil it with red stencil paint. I've had some for about 10 years, I need to use it anyway. Stencil is perfect!!   Wrong.... after 24 hours the paint is still not dry.  I immediately set about getting that paint off. Of course, it leaves a red stain. So, sanding down to the grain, I apply Golden Oak Danish Rubbing Oil. Done, don't touch it! 


Thursday, October 27, 2011

The Cottage

Here's my experimental house from Hobby Lobby that I referred to in a previous post.  It's the $29 house from Greenleaf that they call "The Orchid".  Very thin, less than optimal quality wood and cuts. But, it's do-able.  I was pretty pleased with the project and got to use a lot of my old inexpensive furnishings from 20-25 years ago. Fun project to prepare me for the big house....

The Cottage pre landscaping. You can't see it very well, but I hand painted the roof shingles after I put each one on seperately. I wanted to make the roof look kind of old and stained by the weather.

The Living Room - I made the couch out of an old leather purse, the table out of an old broken table and 2 spindles and the other stuff is from my old stash....

I love tiny things!

I bought a miniature bare light bulb, painted it red with nail polish, and installed it in an old cheap fireplace that I painted white....

These are my original kitchen appliances from years ago. I repainted them white, with faux granite on the sink top, and put on new cabinet knobs. The rug was needlepoint years ago.


I made the pie recently with polymer clay. It's a cherry pie! I also installed a light in the refrigerator. I wanted to have a man drinking milk from the jug with the fridge door open...wonder where I got that idea... 

The bed was cut down from a full to a twin years ago. I recently painted it white and made some new linens for it. The dresser and accessories are a recent aquisition from Ebay. I love it!


I made the magazine for the bed...photoshop, etc.

The bathroom. Again, recycled fixtures. They had yellowed stickers of roses on them, so I just scrubbed and bleached them...good as new!

Wednesday, October 26, 2011

The "Where do I start?" anxiety sets in.....

So, I finished the hand quilting that needed to be finished before I started the dollhouse. It's like an "I can't wait" moment lasting a couple of weeks. Finally I finish and it's like a "OMG where do I start moment"!  Lots of pieces in a dollhouse...
  • I unpacked them all and counted and labeled all the pieces. 
  • I dry fitted the walls and floors together to get an idea of what I would be dealing with when I begin assembly in earnest. 
  • Then I painted and sanded and painted and sanded each piece with Cabot's Fast Drying Sanding Sealer.  What a mess! But, each piece of wood became sealed, hardened, slick and supposedly protected from warping.  I'm glad I took the time to do this because it's more forgiving if you make a mistake on your walls and need to remove wallpaper,etc.  Be careful not to seal the edges that are to be glued....


In the meantime, Cliff and I decide it's time to check out a dollhouse shop. There are basically 2 in Houston and none in my area south of town. I prefer Dollhouses Unlimited in Spring because she has a ton of stuff and she's wonderful to work with. She's great about shipping stuff as well. Anyway, we could not believe the stuff available for the house.  We managed to leave there with a Parlor set, a stove, bedroom set, a cat, a bathroom set, etc. Some many things, so little time.....

Why???

So, you might be wondering....why is a 57 yo building a dollhouse for herself? Actually, it's Cliff's fault. You'll find that when I am rationalizing, which I constantly do, that more often than not, it's Cliff's fault.  Not that "being at fault" is always a bad thing.  So, my husband and I are conversing about 2 months ago. "How would you like a dollhouse for Christmas?", says he. To which I reply, "What?". I mean, where did that come from?   "Well, I know you had one when I met you and you don't have one now and I need to get you something for Christmas...."  Well, I'm just shocked he thought about that. "No, it just takes too much time and space. I appreciate it, but I have too much on my plate now."  At the time, I was trying to finish a king size pre-Civil War quilt that I had foolishly started quilting by hand. Arghhh!  It's true...I did have a dollhouse 23 years ago. I think it must have been half scale, but I can't remember that much about it. I know it was a farmhouse that I painted yellow with white trim and installed working windows in.  Not a very expensive one, but I enjoyed making things to go in it. I lost it in the divorce. Yep, my ex asked for and was granted possession of my dollhouse. That's one of many reasons we're not married anymore - because that's the way he rolls. Anywhoooo...Now Cliff had me thinking of dollhouses. Googling dollhouses. Dreaming of dollhouses.  Obsession --- because that's the way I roll.  Yes, I did finish the handquilting first, it's on my bed now. I also bought a $29 kit for a 4 room "Orchid" house to experiment with.  This is my version of "Orchid".

The Katherine Dollhouse Project

The best place to start is usually at the beginning, but I'm already past that. I'm deep into my new project the Katherine Dollhouse. It's a kit from a small company "The House That Jack Built" that sold out to a corporation who is starting to make them from MDF board.  I was lucky enough to find an original one on eBay that was still in the boxes. They wanted $595 with free shipping and, on an impulse, I hesitantly "made an offer" of $300.  From my research, I knew it should typically go for around a $1000 unassembled, but I couldn't find one to buy and besides, $1000, really? Not that the craftsmanship is not worth it, but $1000 is a lot of money to me.
I was hesitant to buy it because it wasn't my first choice in style. But I had a "want list" growing in my mind.
My house should have -
  • 1:12 inch scale
  • doors on the front
  • all wood construction
  • a footprint of less that 2 feet x 3 feet
  • be basic enough to allow for my artistic expression
Katherine is a 1:12 inch scale front closing dollhouse that allows me to close it up like a cabinet (keeps Pixie Bob cats out - more about that later) and also allows me to open it and see all the rooms without having to spin the house around or place it in the middle of a room. Perfect!
Katherine has 9mm (≈ 3/8") birch faced cabinet grade plywood that makes it sturdy, with enough face on the edges to glue things together securely. Also, it will be the correct size for the miniature doors and windows I need. Perfect!
Katherine's measurements are 37"wide, 20"inches deep (with the porch added), and 31" high. Perfect!
Katherine came with "not installed" non-opening windows, unassembled 1st floor stairs, and a front door that I could easily change/replace. They already cut the hole for the stairs, but the interior walls can be placed wherever I want them (except the one by the stairs). The exterior "siding" is milled into the wood already. So...close to perfect....

Anyway, I was hesitant about making an offer, but we had to go run errands so I ran it by Cliff, quickly clicked it and ran off to do our errands. Why would I consult my husband? You should know that Cliff is responsible for this whole dollhouse era I'm in right now. But, more about that later....  By the time I returned home, I truly believed that I MUST have this house! In my typical obsessive fashion, I went from "I'll just make this offer and if they accept, whatever" to "this is the only house in the world for me and I should have offered more!"  Well......drum roll........they accepted the offer. YAY!  So, though I felt guilty for spending ANY money on a dollhouse, I have just managed to save $1750! Ohhhhhh..... I didn't tell you I was looking at a Sid Cooke dollhouse in England for $2100?  Oh yeah, I can easily become obsessed...it is an illness...:-). The worse part is...Cliff would let me buy it, thereby feeding into my obsessiveness and allowing me to run amouk! I just really did not want  a second mortgage or the buyer's remorse that comes with it, if you know what I mean. So, in short, I'm pretty happy with the $300 scenario and excited about the house....
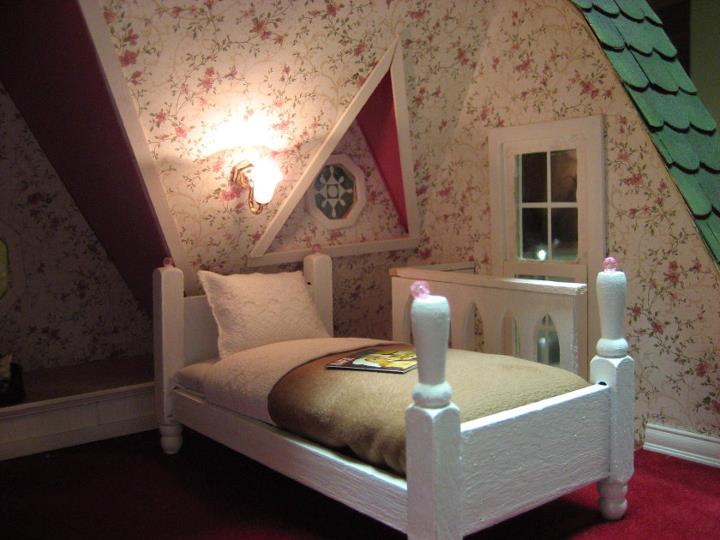
Advertisment Picture for the Katherine House

Nope, that's not me in the picture! HA!